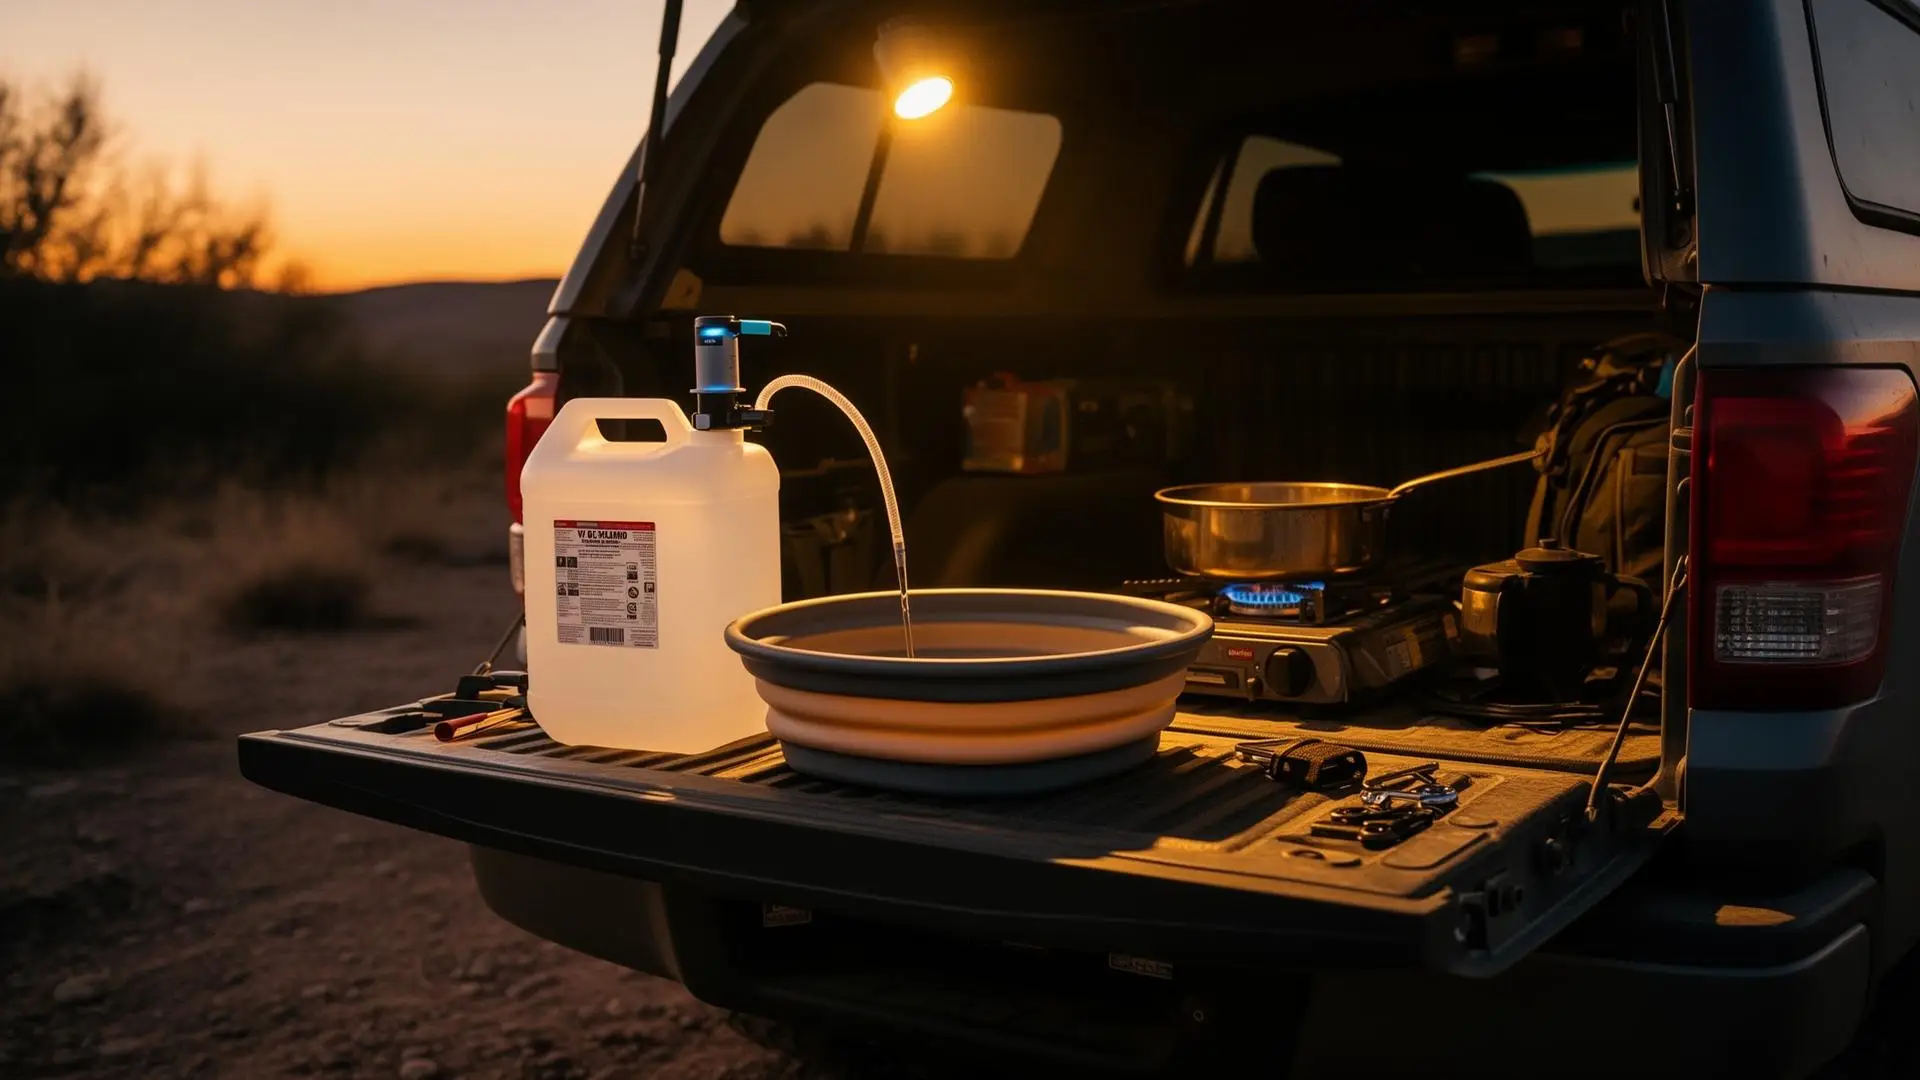
The first night, nobody cares about running water. You pull into camp late, flip on a headlamp, make dinner on the tailgate, and tell yourself the blue water jug is fine. It is fine. You tip it sideways, splash half the water onto the dirt, rinse your hands badly, and call it camping.
By night three, the romance is gone. The cutting board smells like onions. The dog bowl has a layer of dust in it. Someone needs to brush their teeth. The coffee pot needs water. The water jug is buried behind the cooler, and every small chore now requires unloading the back of the vehicle like you are searching for evidence.
That is when running water stops feeling fancy.
Quick Answer
The funny part is that you do not need an expensive overland kitchen to fix this. You need a clean jug, a small pump, a hose, and a place for dirty water to go. That is the whole trick.
The Quick Build: What You Are Making
This project turns a normal water jug into a portable camp sink you can use from a tailgate, camp table, drawer platform, van floor, or SUV cargo area.
The beginner version is intentionally simple:
- One water jug
- One rechargeable faucet pump
- One short food-safe hose
- One folding basin or collapsible sink
- One small tote or milk crate to keep it together
- Optional spray nozzle
- Optional gray water jug
No permanent tank. No holes drilled in the vehicle. No pump mounted behind a panel where you cannot reach it. No tiny RV cosplay.
That matters because the best first overland water system is the one you actually clean, refill, pack, and use. Permanent plumbing looks clean in a build video. A removable jug works on Friday night when you are tired, dusty, and trying to make tacos before the wind picks up.
The Honest Truth About DIY Overland Water Systems
The mistake is not building one. The mistake is building it like a tiny house.
A camp water system lives a hard life. It gets bounced down washboard roads, filled from campground spigots, left in the sun, frozen in shoulder season, shoved under sleeping bags, and ignored between trips. The more complicated it is, the more ways it has to leak, smell bad, grow things, or make you hate cleaning it.
That is why this guide starts with the removable version. Not because permanent systems are bad. A van, camper, trailer, or dedicated long-distance rig can absolutely justify a tank, pump, switch, filter, faucet, drain, and winterization routine. But most 4x4 Playground readers are not building a tiny house. They are trying to make a Tacoma, 4Runner, Bronco, Outback, Gladiator, Wrangler, van, or half-ton truck easier to live out of for a weekend. Different job. Different answer.
The right DIY overland water system should pass five tests:
- You can fill it anywhere.
- You can clean it without tools.
- You can remove it when the trip is over.
- It does not leak inside the vehicle.
- It solves more problems than it creates.
If your design fails those tests, it may still look good. It is just not a beginner-friendly camp water system anymore.
Parts List: The $60 Version Most People Should Build
The sweet spot is a rechargeable pump on a 5 to 7 gallon jug, paired with a basin and a simple way to catch or dispose of gray water.
| Part | Typical cost | What to look for |
|---|---|---|
| 5 to 7 gallon water jug | $15 to $35 | Food-safe, wide opening to clean, stable shape |
| Rechargeable faucet pump | $15 to $30 | USB charging, removable intake tube, simple on/off |
| Food-safe silicone hose | $5 to $15 | Fits the pump and reaches the bottom of the jug |
| Collapsible basin | $8 to $20 | Big enough for dishes, small enough to pack flat |
| Small tote or milk crate | $8 to $20 | Holds pump, hose, basin, soap, towel, sponge |
| Biodegradable camp soap | $4 to $8 | Use sparingly, keep away from waterways |
| Quick-dry towel or dish cloth | $3 to $10 | Dedicated camp kitchen towel |
| Optional gray water jug | $10 to $25 | Useful where draining on the ground is not appropriate |
Most people can build a useful version for about $45 to $75 if they already own a jug or tote. The best part is that almost nothing here is vehicle-specific. The same setup can move from a Tacoma to a 4Runner to a Subaru Outback to a borrowed van without making the next owner wonder why there are holes in the cargo floor.
The Three Versions: Cheap, Better, and Overbuilt
There are three realistic ways to build camp water: gravity, rechargeable pump, or 12V pump. Start with the simplest version that solves your actual problem.
| Version | Typical cost | Best for | What you get | Main trade-off |
|---|---|---|---|---|
| Gravity jug | $20-$35 | Beginners, short trips, backup water | No battery, no wiring, almost nothing to break | Awkward flow and two-hand use |
| Rechargeable pump | $45-$75 | Most weekend overlanders | Easy running water with no vehicle wiring | Needs charging and careful storage |
| 12V pump system | $90-$150 | Frequent camp cooks and longer trips | Better flow, sprayer options, switchable | More parts, more leak points, more wiring |
| Permanent tank | $250+ | Vans, trailers, dedicated campers | Built-in convenience | Harder to clean, heavier, less flexible |
If this is your first water system, build the rechargeable pump version. It gives you 80 percent of the comfort with 20 percent of the commitment. That is usually where good overlanding lives.
Why a 5 to 7 Gallon Jug Is the Right Starting Point
A 5 to 7 gallon jug is big enough for a weekend and still small enough for one person to move.
Water is heavy. This is the part people forget until they pick up the jug. One gallon of water weighs about 8.34 pounds.
| Water amount | Water weight (before container) |
|---|---|
| 3 gallons | about 25 lb |
| 5 gallons | about 42 lb |
| 7 gallons | about 58 lb |
| 10 gallons | about 83 lb |
| 15 gallons | about 125 lb |
A 7 gallon jug sounds reasonable until you are lifting it into a cargo area after filling it at a gas station spigot. Ten gallons sounds expedition-ready until it becomes a small passenger that never helps set up camp. For most weekend trips, 5 to 7 gallons is the useful zone.
Go smaller if you are solo and near refill points. Go larger if you are cooking for a family, carrying dogs, camping in heat, or driving somewhere dry. But do not guess. Water weight counts against payload.
Step-by-Step: How to Build the No-Drill Camp Sink
The whole build should take less than an hour, and most of that time is figuring out where you want the jug to sit.
1. Pick the jug first
Start with the water container, not the pump. A good overland water jug should be food-safe, stable when full, easy to fill, easy to clean, strong enough for rough roads, and shaped so it fits your vehicle. A classic rectangular camping jug works fine. So does a Scepter-style water can, a Reliance-style container, or a low-profile water cube if it fits your cargo system. The opening matters more than people think. If you cannot clean the inside, you will eventually stop trusting the water.
2. Test the pump before modifying anything
Charge the pump fully. Drop the intake tube into the jug. Turn it on. Make sure it moves water before you start planning around it. Some cheap rechargeable pumps are surprisingly useful. Some are sad little fountains with commitment issues. Test first.
3. Replace the hose if the stock hose is flimsy
Many faucet pumps come with a short plastic tube that technically works, which is not the same as being good. If the hose kinks, smells weird, or does not reach the bottom of your jug, replace it with food-safe silicone hose that fits the pump barb. This is a cheap upgrade that makes the system feel less like a novelty and more like a tool.
4. Decide where the jug will live while in use
Good locations: tailgate, camp table, truck bed near the tailgate, SUV cargo floor, drawer platform, van step or galley area, ground next to the cooking station. Bad locations: anywhere the jug can tip over, anywhere water can leak into bedding, anywhere the hose gets pinched, anywhere you need to unload half the vehicle to reach it. Your water should be one of the easiest things to access at camp. If it is buried, you will use it less.
5. Add the basin
A collapsible basin turns running water into a working sink. Without a basin, you just have a pump that sprays water onto dirt. That is still useful for hands and dog bowls, but not great for dishes. A basin lets you wash vegetables, rinse cups, clean utensils, catch gray water, keep soap away from the ground, and carry dishes back to the kitchen box. Do not overthink this. The cheap folding basin is usually enough.
6. Build the water tote
Put the pump, hose, basin, soap, sponge, towel, and maybe a small spray bottle into one tote. That tote becomes the water kit. When you pull into camp, the whole thing comes out at once. When you pack up, the wet stuff goes back into the same place instead of dripping across your sleeping bag. This is the kind of small system that makes camp feel calm.
7. Label clean and dirty parts
If you carry a gray water jug, make it obvious. Clean water and gray water should never be confused at 10:30 p.m. under a headlamp. Use different color containers, big labels, or both. This sounds too simple to mention until someone fills the wrong jug. Then it becomes the only thing anyone talks about for the rest of the trip.
Where to Put It in Different Rigs
The best location is close to your kitchen, low enough to be stable, and easy to remove when the trip is over.
Tacoma or midsize truck
In a Tacoma, Ranger, Colorado, Frontier, or Gladiator, the easiest setup is usually near the tailgate. Put the jug against the bed wall or in a crate so it cannot slide. Run the pump at the tailgate, with the basin on the tailgate or a camp table. If you have a bed rack or drawer system, keep the water low and forward when driving so the weight does not live high and behind the axle. Do not mount the water high on the rack just because it looks cool. Water is heavy, and gravity has never been impressed by accessories.
4Runner, Bronco, Wrangler, or SUV
In an SUV, leaks matter more because the cargo area is also your living space. Keep the jug upright, secured, and preferably inside a shallow tote or tray. Use the system outside the vehicle whenever possible. A tailgate table, camp table, or rear cargo platform works well as long as the basin catches drips. If you sleep inside the SUV, do not store a questionable water system next to bedding. Moisture is annoying. Mystery moisture is worse.
Subaru Outback or soft-roader
A Subaru Outback, Crosstrek, Forester, RAV4, or similar soft-roader benefits from the removable version because cargo space is precious. A 3 to 5 gallon jug may make more sense than a 7 gallon jug. Pair it with a small basin and rechargeable pump, then store the whole kit in a tote that can live behind the rear seat or under a sleeping platform. The goal is not to imitate a full-size truck. The goal is to make camp chores easier without turning the cargo area into a hardware store.
Van or camper
A van can justify a more permanent system, but you still might want to start portable. A removable jug teaches you how much water you actually use, where you naturally cook, where dirty dishes pile up, and whether you need a real sink. Build the cheap system first, then let the trip pattern design the permanent one. That order saves money.
Clean Water, Gray Water, and Not Being That Campsite
Running water makes camp nicer, but it also gives you a responsibility to handle dirty water properly.
Gray water is the used water from handwashing, dish rinsing, food cleanup, and tooth brushing. It may look harmless. It is not always harmless. It can contain food scraps, soap, grease, toothpaste, coffee grounds, dog slobber, sunscreen, and dirt and bacteria from your hands.
The rule is simple: keep gray water away from lakes, rivers, streams, springs, and fragile desert surfaces. Follow the local rules for the land you are on. Some places allow broadcast disposal away from water sources. Some require packing it out. Some developed campgrounds have utility sinks or gray water drains. If you do not know the rule, catch it in a basin and dispose of it conservatively. Also, use less soap than you think. The goal is clean dishes, not a foam party for ants.
How to Keep the System Clean
A water system you cannot clean is not a water system. It is a future smell.
After each trip:
- Empty the jug completely.
- Rinse the jug with clean water.
- Wash the hose and pump intake.
- Let everything dry fully before storage.
- Store the cap loose so the jug can breathe.
- Keep the pump separate if it traps moisture.
Before the next trip:
- Inspect the jug.
- Smell it. Yes, really.
- Flush the pump and hose.
- Fill with fresh water.
- Test the pump before packing the vehicle.
If the jug smells weird, clean it before the trip. Do not discover the problem at camp when your dinner plan depends on pasta water.
The Mistakes That Make DIY Water Systems Annoying
Most bad camp water systems are not bad because they are cheap. They are bad because they ignore how people actually move around camp.
Mistake 1: Burying the water
Water should be accessible before the tent, before the chair, and before the snack bag. You use it constantly. If it is behind the cooler, under the sleeping bags, and wedged next to the recovery kit, the system has already failed.
Mistake 2: Carrying too much water too high
Water belongs low and secure while driving. A full 7 gallon jug weighs close to 58 pounds before the container. Put that weight high on a rack and you will feel it in body roll, braking, and off-camber confidence.
Mistake 3: Building a system you cannot remove
Permanent water systems are great until they leak, freeze, need cleaning, or get in the way of a different trip. If your vehicle is not a dedicated camper, removable is usually smarter.
Mistake 4: Forgetting gray water
Clean water gets all the attention. Dirty water causes the problems. Bring a basin at minimum. Bring a gray water container when the land, campground, or common sense calls for it.
Mistake 5: Confusing pressure with usefulness
You do not need a shower-grade blast to rinse a coffee cup. A gentle pump uses less water, makes less mess, and stretches your supply longer. More pressure feels impressive until your 5 gallon jug is empty before dinner.
Should You Build a 12V Pressurized System Instead?
A 12V pump is worth it if you camp often, cook real meals, or want a sprayer. It is not necessary for everyone.
A simple 12V system usually includes a water tank or jug, a 12V diaphragm pump, a switch, a fuse, wiring, hose, faucet or sprayer, and a mounting board or box. The advantage is better flow and a more permanent feel. You can add a sprayer for dishes, muddy hands, boots, dog paws, or quick gear rinses. The trade-off is complexity. Now you have wiring, fittings, pressure, mounting, and more ways to leak.
If you are cooking every night, camping often, or running a dedicated truck bed kitchen, the 12V version can be worth it. If you camp once a month and mostly need handwashing, coffee water, and dish rinsing, the rechargeable pump is the better first move. Start simple. Upgrade only after the cheap version tells you what is missing.
Who Should Build This
This DIY water system is for people who want camp to work better without committing to a permanent build.
Build it if you cook at camp, travel with kids or dogs, hate wrestling a heavy jug every time you need water, use a tailgate or camp table as your kitchen, want a portable system that works in multiple vehicles, are building slowly and do not want to drill holes yet, or want a cheap first project that immediately improves camp life.
Skip it if you only do one-night trips and a basic spigot jug is enough, you already have a van sink or trailer galley, you do not want to clean another piece of gear, or you mostly eat cold food and never wash dishes at camp.
This is not a mandatory mod. It is a friction reducer. And that is what good camp gear should be.
The Bottom Line
The best DIY overland water system is not the fanciest one. It is the one that makes camp easier, stays clean, does not leak, and disappears when you do not need it.
Running water changes the rhythm of camp. Coffee gets easier. Dishes get less annoying. Hands get clean before food. The dog gets water without the weird splash dance. Tooth brushing stops feeling like a negotiation. You use less water because the pump gives you control instead of dumping half the jug into the dirt.
That is the win. Not the pump. Not the hose. Not the overland build points. The win is that a cheap Saturday project removes a dozen tiny annoyances from every trip after it. Most people learn this after buying a drawer system, a bigger kitchen box, and three different jugs that all roll around the cargo area. You can learn it for sixty bucks.