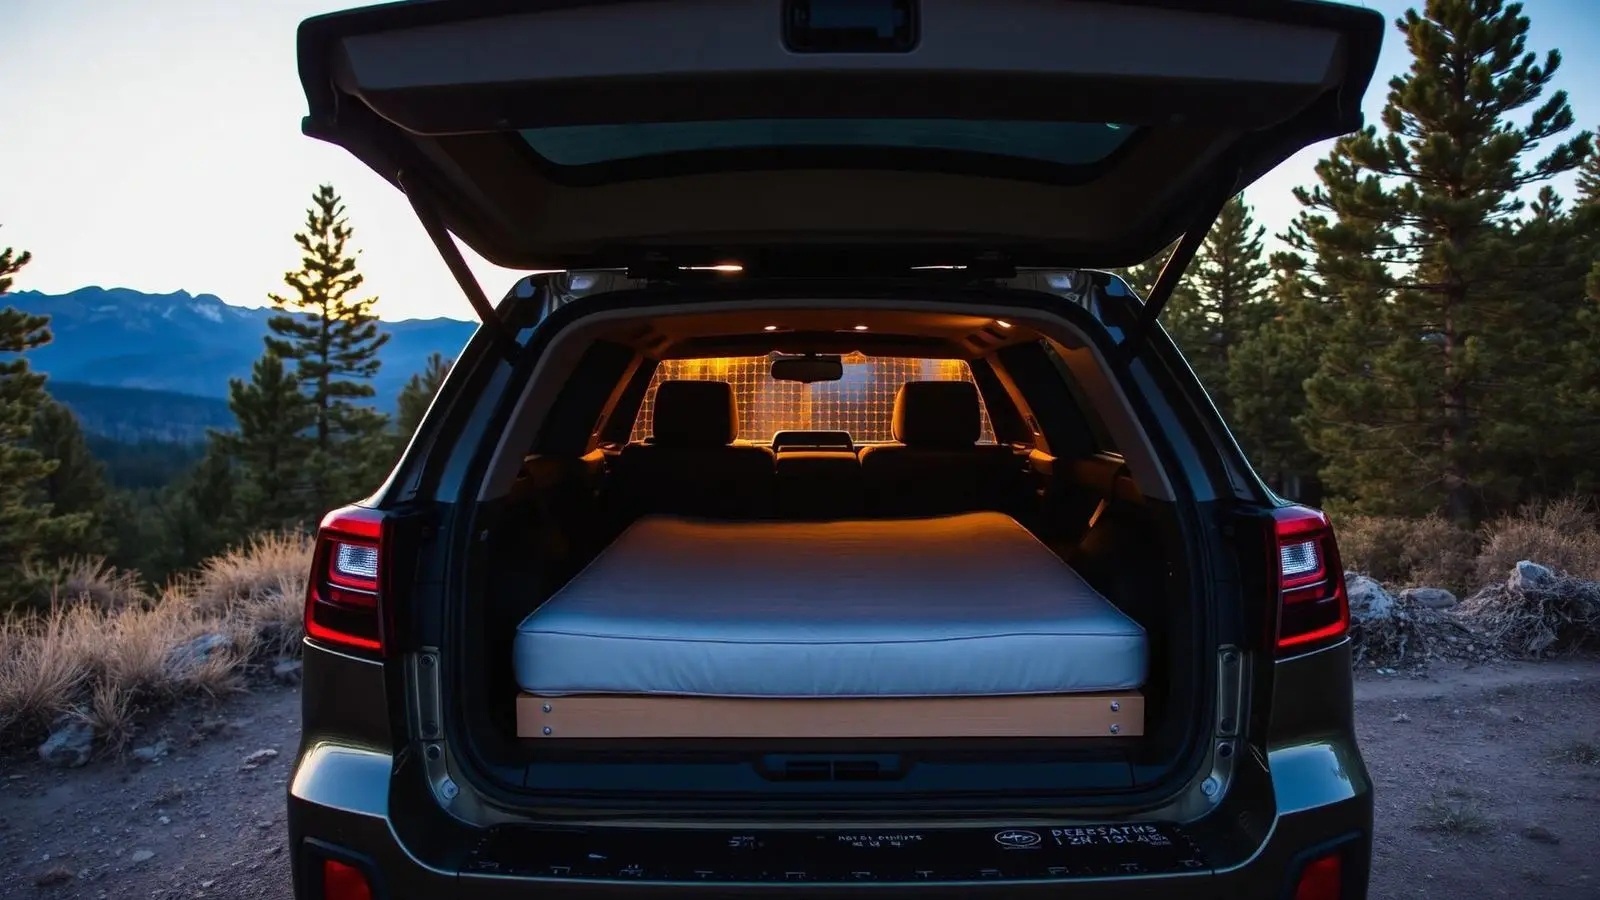
You bought an Outback because you wanted to go places. At some point, "going places" turns into "sleeping there too." And once you spend a night folded up in the back seat like a bad map, you start thinking about a sleeping platform.
Good news: building one is easier than you think, cheaper than you'd expect, and it will genuinely change how you use your car. This guide walks you through the entire build, from materials to cutting to finishing, with a cost breakdown, model-year compatibility notes, and the mistakes you can skip because other people already made them.
Is a Sleeping Platform Right for Your Outback?
A sleeping platform gives you a flat, elevated surface in the cargo area so you can sleep on a real sleeping pad or mattress instead of the angled, folded-seat mess the factory left you with. The platform sits on top of the folded rear seats and uses the cargo floor for support. Most builds also include storage underneath, either open bins or slide-out drawers, which is where the real utility lives.
You don't need to be a carpenter. If you can use a circular saw, a drill, and a measuring tape, you can build a solid platform in a weekend.
Subaru Outback Model-Year Compatibility
The cargo dimensions have changed across generations. Build to your specific generation, not a generic internet template.
Key Dimensions to Measure
- Floor to headliner with seats folded (determines platform height and usable sleeping clearance)
- Width at the wheel wells (this is your narrowest point, typically around 38 inches)
- Width at the widest cargo area (usually around 42-44 inches)
- Length from rear hatch seal to the folded seatback
5th Gen (2015 to 2019)
Cargo area with seats folded is approximately 75 inches long, 42 inches wide at the widest, and 24 inches tall to the headliner. The rear seat folds flat with a slight angle near the seatback hinge. You may need a small leveling riser near the seatback to get a truly flat surface.
6th Gen (2020 to 2024)
Cargo area is roughly the same length but the floor profile is slightly different. The D-ring anchor points are in new positions. If you're building a platform with tie-down integration, account for this.
7th Gen (2025+) and Outback Wilderness
Same footprint as 6th gen but the Wilderness trim has raised floor storage bins that affect platform leg placement. Measure twice before cutting.
What You'll Build
The basic Outback sleeping platform is a two-section plywood surface that:
- Lays flat across the folded rear seats and cargo floor
- Sits at a consistent height end-to-end (no slope)
- Has clearance underneath for gear storage
- Breaks down in 10 to 15 minutes when you need your cargo space back
Materials List and Cost Breakdown
| Item | Qty | Approx. Cost |
|---|---|---|
| 3/4" birch plywood (4x8 sheet) | 1 sheet | $65 to 90 |
| 1x4 pine boards (8 ft) | 3 boards | $15 to 20 |
| 2x4 lumber (8 ft) | 2 boards | $10 to 14 |
| Wood screws (1.5" and 2.5") | 1 box each | $10 to 15 |
| Foam sleeping pad or 2" foam sheet | 1 | $30 to 80 |
| Sandpaper (80 and 120 grit) | 1 pack | $5 |
| Wood stain or polyurethane (optional) | 1 can | $15 to 20 |
| Non-slip rubber mat or furniture feet | 1 pack | $8 to 12 |
| L-brackets (for frame reinforcement) | 6 to 8 | $10 |
| Total | $168 to 261 |
If you already have basic tools and wood scraps, you can get under $150. If you add a slide-out drawer system, budget another $40 to 80 in drawer slides and hardware.
Tools Needed
- Circular saw or jigsaw
- Drill and bits
- Measuring tape
- Pencil and straight edge
- Clamps (helpful but not required)
- Safety glasses
Step-by-Step Build Guide
Step 1: Measure Your Cargo Area (Don't Skip This)
Fold the rear seats flat and take every measurement listed in the compatibility section above. Pay attention to the wheel wells, this is where most platform builders get burned. The wheel wells create a narrowing that your platform legs need to sit outside of or the platform won't sit stable.
Mark your measurements on paper with a rough sketch. You're building two panels: one that covers the cargo area behind the rear seats, and one that bridges over the folded seat section. They'll connect in the middle.
Step 2: Cut Your Plywood Panels
From one 4x8 sheet of 3/4" birch plywood, cut two panels:
- Panel A (cargo section): Sized to fit the cargo floor from the rear hatch to the point where it meets the folded seats. Cut notches into the corners to fit around the wheel wells.
- Panel B (seat section): Sized to cover the folded rear seats from the seatback hinge forward. This panel bridges the height difference between the cargo floor and the folded seat surface.
Step 3: Build Your Support Frame
The platform needs legs to keep it level. The cargo floor and the folded seat surface are at different heights, so you're compensating for that difference with a simple 1x4 frame.
For the cargo section (Panel A), build a perimeter frame from 1x4 boards that sits on the cargo floor and raises the panel to the correct height. Add a center support running the length of the platform for rigidity. Screw the frame together with 2.5" screws and reinforce the corners with L-brackets.
For the seat section (Panel B), you typically don't need a frame, the folded seats provide the support. But if there's a slope or lip near the seatback hinge, use a thin riser strip of 1x4 or 2x4 at the hinge line to level things out.
Step 4: Attach Panels to Frames
Set each frame in position, then lay the panels on top. Pre-drill pilot holes through the panel into the frame to prevent splitting, then screw the panels down using 1.5" screws spaced every 8 to 10 inches around the perimeter and across any center supports.
Check for flex. If the center of either panel sags when you stand on it, add a mid-span support leg or cross brace.
Step 5: Fit and Test in the Vehicle
Before finishing, do a dry fit in your actual Outback. Check:
- Are the panels level with each other end-to-end?
- Is there any rocking or instability?
- Do the wheel well notches clear properly?
- Is the surface height comfortable for getting in and out?
- Does the rear hatch close completely?
Step 6: Sand and Finish
Sand all surfaces starting with 80-grit, then finish with 120-grit. Pay attention to edges, rough edges will destroy your sleeping pad and your patience.
Finish options:
- Polyurethane: Best moisture protection, easy to apply, dries hard. Two coats minimum.
- Stain + polyurethane: Looks better, same protection. Pick a stain color that suits the interior.
- Left raw: Fine for dry climates. Not recommended if you'll be sleeping in wet conditions.
Pro Tip
Step 7: Add Non-Slip Surface
- Cut a piece of non-slip rubber shelf liner to fit the top surface and staple or glue it down.
- Or apply outdoor carpet to the platform surface with contact cement, looks clean and adds insulation.
- Or use removable furniture grip pads on the underside of your mattress or pad.
Step 8: Set Up Underbed Storage
With the platform installed, the space underneath is your gear zone. You don't need drawers to use it well:
- Use stackable plastic bins that slide in from the rear hatch. Label them.
- Sew or buy stuff sacks in specific sizes to fit the space. Soft bags conform to irregular spaces better than bins.
- Leave one side open for longer items (trekking poles, fishing rods, recovery boards).
If you want drawers, install drawer slides on the inside walls of the support frame before attaching the top panel. Full-extension drawer slides rated for 75 to 100 lbs work well.
Common Mistakes (and How to Skip Them)
- Cutting panels too wide. The wheel wells will stop a panel that's even a quarter-inch too wide. Measure at the wheel wells, not just the door opening.
- Not accounting for the seatback hinge slope. On most Outback generations, the folded rear seats aren't perfectly flat. A simple riser board at the hinge line solves it.
- Using cheap softwood for panels. Standard pine is fine for the frame. Avoid OSB, it absorbs moisture fast and will swell and crumble. Birch plywood for panels, pine 1x4 for the frame.
- Making it permanent. Don't glue anything to the car. Don't bolt through the cargo floor. Design the platform so it comes out in 10 to 15 minutes.
- Underestimating sleeping length. Most platforms give you about 72 to 75 inches. If you're over 6 feet tall, measure your actual sleeping length first. Taller overlanders often sleep diagonally or extend the platform forward with a footbox behind the front seats.
What to Sleep On
- Sleeping pad: A standard backpacking pad (foam or inflatable) works. Lightweight, compact, affordable.
- Foam sheet: A 2-inch foam sheet cut to platform dimensions is the budget sweet spot.
- Inflatable car mattress: Several companies make inflatable mattresses sized specifically for Subaru Outbacks. Comfortable but pack down to almost nothing.
- Memory foam topper: Cut a piece of 2 to 3 inch memory foam to size. Most comfortable option but bulkiest to store.
The Bottom Line
Building a sleeping platform in your Subaru Outback is one of the best weekend projects you can do for your overlanding setup. It costs less than two tanks of gas, takes a Saturday to build, and changes how you think about camping. No campsite booking required. No tent setup in the rain. Just fold the seats, slide in the platform, and go.
The trail doesn't care what you slept on. But you will.