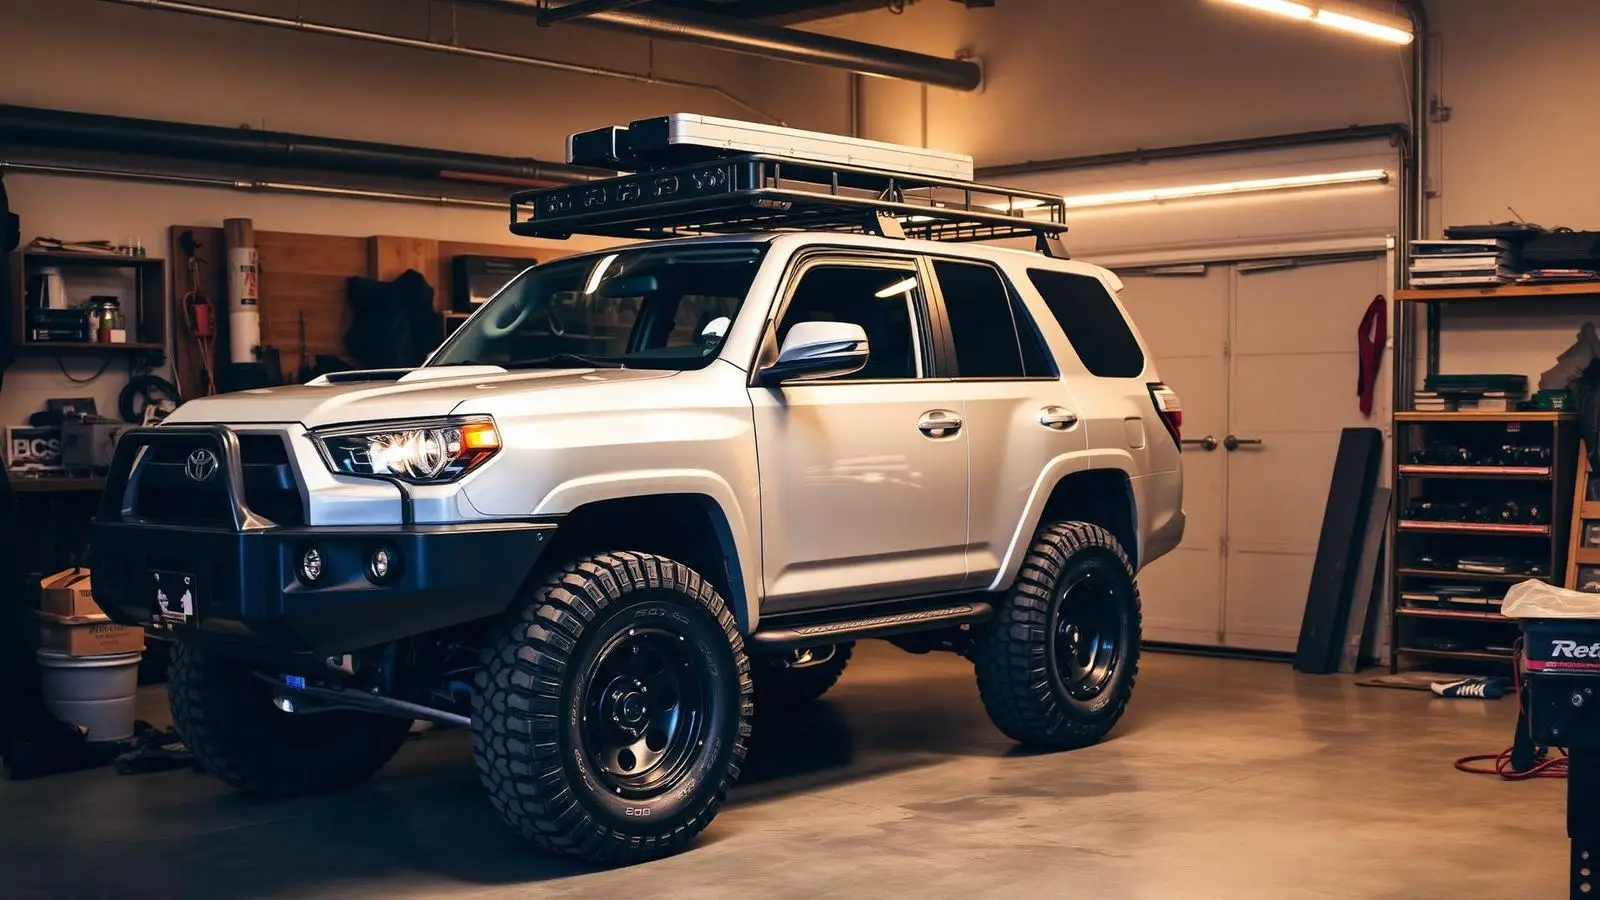
Here's what happens to almost every new overlander: you go on your first trip, catch the bug hard, fall down a YouTube rabbit hole, and end up with seventeen browser tabs open and a $45,000 wishlist. Welcome to mod paralysis.
This guide is the antidote. What follows is a field-tested, logical build sequence for turning any capable vehicle into a proper overlanding rig. Not the Instagram version. The real version, where every dollar actually makes your trips better and every upgrade builds on the one before it.
We've watched dozens of rigs get built over the past few years. The ones that turn out well follow a pattern. The ones that don't? They also follow a pattern. Usually involving a $3,000 rooftop tent on factory shocks.
Before You Start: The Questions That Save You $5,000
The single biggest mistake people make is treating an overland build like a generic project. Before spending a dollar on modifications, answer these honestly:
- Where are you actually going? Forest service roads vs. technical rock trails require completely different builds. A Moab rock crawling rig is not the same as a backcountry camping rig.
- How long are your typical trips? Weekend warriors need different gear than week-long expedition runners. A 48-hour campout doesn't need a $2,500 dual-battery solar system.
- Is this your daily driver too? Every modification affects commuting comfort, fuel economy, and parking garage clearance. This shapes every decision.
- What's your realistic budget over 12-24 months? A phased build based on real trip experience beats financing untested gear every single time.
The Weekend Warrior Reality Check
Stage 1: Tires (Start Here, Always)
If there is one universal truth about overlanding upgrades: tires are the single most impactful modification you can make to any vehicle. Full stop. Ask any experienced overlander what they'd prioritize with a limited budget, and the answer is unanimous.
Better tires improve traction in dirt, gravel, mud, sand, and snow. They reduce the chance of sidewall punctures. They build confidence. And unlike most other modifications, you notice the improvement immediately on every single trip. The jump from factory highway tires to quality all-terrains is the largest single capability gain in overlanding.
Tires also come first for a practical reason: they affect everything that comes after. Getting the right tire size before your suspension lift means your lift kit is sized properly. Doing it in reverse often means buying suspension twice.
Choosing the Right Tires
For most overlanders, all-terrain (AT) tires are the right answer. Capable enough for backcountry roads, comfortable enough for highway miles, and durable enough for rocky terrain. Mud-terrain (MT) tires are only right if you spend significant time in deep mud or technical rock, and they come with real trade-offs in road noise, tread life, and wet pavement handling.
Top All-Terrain Tires for Overlanding
| Tire | Best For | Price (Set of 4) | Tread Life |
|---|---|---|---|
| BFGoodrich KO2 | All-around AT, sidewall protection | $900-$1,400 | 50,000-60,000 mi |
| Falken Wildpeak AT3W | Wet performance, budget premium | $750-$1,100 | 55,000-65,000 mi |
| Toyo Open Country AT III | Highway comfort + trail capable | $800-$1,200 | 60,000-65,000 mi |
| Cooper Discoverer AT3 XLT | Budget builds, light truck | $650-$950 | 50,000-60,000 mi |
| Nitto Ridge Grappler | Hybrid AT/MT, aggressive look | $900-$1,400 | 45,000-55,000 mi |
| General Grabber ATX | Best value dollar-for-dollar | $600-$900 | 50,000-60,000 mi |
Tire Sizing Rule of Thumb
Budget: $800-$1,500 for four quality AT tires. $1,500-$2,000 for larger sizes or premium brands. Add $400-$1,000 for new wheels if your factory wheels won't accommodate the wider size.
Stage 2: Suspension
Once your tires are sorted, suspension is the natural next upgrade. Good suspension creates clearance for larger tires, improves articulation on uneven terrain, and dramatically improves ride quality when loaded with gear. That last point gets overlooked. Factory suspension is tuned for an empty vehicle with one or two passengers. Load it with 500+ lbs of camping gear and it sags, bounces, and handles poorly. Quality aftermarket suspension is designed for loaded travel.
How Much Lift Do You Actually Need?
- 1.5-2 inches -- Plenty for general overlanding. Clears most AT tire sizes without destroying on-road handling. This is the sweet spot for 90% of overlanders.
- 3 inches -- Appropriate for 33-35 inch tires and more aggressive terrain. Requires upper control arm upgrades on most IFS trucks.
- Beyond 3 inches -- You're building for rock crawling, which requires significantly more supporting modifications including driveline corrections.
Suspension Brands That Earn Their Reputation
- Old Man Emu (OME) -- The gold standard for overlanding suspension. Australian-designed for loaded travel. Their BP-51 bypass shocks are exceptional. Best value-to-quality ratio in the market.
- Bilstein 5100/6112 -- Excellent mid-range option. The 5100 series is a popular and affordable upgrade. The 6112 coilover is a more adjustable step up.
- Fox 2.0/2.5 -- Smooth, consistent performance. The 2.5 series with reservoir offers excellent heat dissipation for extended trail use.
- ICON Vehicle Dynamics -- Premium adjustable coilovers with CDC valving. Excellent for rigs that split time between highway and trail.
- King Shocks -- The top of the food chain. OEM-fit coilovers with race-proven internals. Expensive, but the ride quality is genuinely next-level.
Avoid the Budget Trap
Budget: $500-$2,500 depending on the kit and installation. Professional installation adds $300-$800 but ensures proper torque specs and alignment.
Stage 3: Skid Plates and Underbody Protection
This is the stage most beginners skip. And the one that bites them hardest on the trail. Your oil pan, transmission, transfer case, and fuel tank are vulnerable aluminum or stamped steel sitting inches from the ground. One rock strike can crack an oil pan, end your trip, and cost $2,000+ in tow bills and repairs.
Think of skid plates as insurance. You hope you never need them. But the first time you hear that sickening crunch of rock on metal and look underneath to find the plate took the hit instead of your oil pan, you'll understand the value instantly.
- Full skid plate set (engine/trans/transfer case) -- $300-$800. Steel is tougher and cheaper; aluminum is lighter but dents more easily. RCI Metalworks, CBI Offroad, and C4 Fabrication make vehicle-specific kits.
- Fuel tank skid -- $150-$300. Worth every penny. Your fuel tank is one of the most exposed and expensive components underneath.
- Rock sliders -- $400-$1,000. Protect your rocker panels and double as a step to access the roof rack. White Knuckle Off Road, Cali Raised LED, and Shrockworks make bolt-on options for popular platforms.
Budget: $600-$1,500 for complete underbody protection.
Stage 4: Recovery Gear
Your rig is capable and protected. Now you're going to venture onto more challenging terrain, and here's the truth: you will eventually get stuck. Everyone does. Recovery gear isn't an upgrade. It's a safety requirement. Heading into the backcountry without it is like driving without a spare tire on the highway.
The Essential Recovery Kit
- Kinetic recovery rope -- Not a tow strap, not a chain. A 3/4-inch kinetic rope rated for your vehicle weight. Stores energy during stretch and releases it to pull the stuck vehicle free. Yankum Ropes and Matt's Off Road Recovery brand are favorites. $80-$150.
- Soft shackles -- Lighter, safer than metal D-rings. Won't become a projectile if they fail. Factor 55 makes the standard. $25-$50 each.
- Traction boards -- MaxTrax is the original and still the best. ARB Tred Pro is a worthy alternative. X-Bull is the budget option. $100-$350 per pair.
- Hi-Lift jack -- 48 or 60 inch. Learn to use it safely before you need it. These are powerful tools that demand respect. $60-$120.
- Shovel -- Quality folding shovel. One of the cheapest, most useful tools you'll ever carry. $30-$80.
- Air compressor + tire repair kit -- Air down for trails, air up for pavement, plug punctures in the field. ARB Twin Motor, Viair 400P, or NOCO portable compressor. $80-$250.
Do You Need a Winch?
Budget (without winch): $400-$800. With winch and bumper: add $1,000-$2,500.
Stage 5: Shelter
You've built a capable rig. Now you need somewhere to sleep. This is where the overlanding industry works hardest to separate you from your money. Shelter is deeply personal and the "right" answer depends entirely on how you camp.
Ground Tents: The Underrated Option
The most affordable, flexible, and underrated option in overlanding. A quality 3-season tent from REI, Big Agnes, or Kelty costs $100-$400. It works with any vehicle, adds no roof weight, and packs down small. Don't let anyone tell you that you need a rooftop tent to be a "real" overlander. Some of the most experienced expedition teams on earth still use ground tents.
Rooftop Tents: Convenience at a Price
Softshell RTTs ($800-$2,500): Fold flat when closed, lighter weight (100-130 lbs). Great brands include Roofnest Sparrow, 23Zero Breezeway, and Thule Tepui.
Hardshell RTTs ($2,000-$5,000): Pop open in under a minute, leave bedding made inside. iKamper Skycamp 3.0, Roofnest Falcon, and ARB Esperance lead the category.
Critical: Suspension Before Shelter
Truck Bed Setups: The Secret Third Option
Build a sleeping platform in your truck bed with storage drawers underneath. Add a bed cap or canopy and you've got a dry, secure, low-center-of-gravity setup for a fraction of RTT cost. GFC (Go Fast Campers) makes the gold standard truck cap/tent hybrid, and DECKED drawer systems provide organized storage underneath.
Stage 6: Power and Electrical
Modern overlanding depends on electricity: fridge, phone, GPS, lighting, satellite communicator. A thoughtful power system separates a comfortable multi-day camp from a stressed-out scramble to charge devices from your cigarette lighter.
The Three-Phase Power Approach
Phase-based electrical upgrades prevent overspending and teach you what you actually need before committing to permanent installations.
- Phase 1: Portable power station ($300-$1,000) -- EcoFlow River 2, Jackery Explorer 500, or Bluetti EB3A. Charges from your 12V outlet while driving. Enough for weekend trips. Start here to learn your actual power consumption before installing anything permanent.
- Phase 2: 12V fridge ($400-$1,000) -- The single biggest comfort upgrade in overlanding. Eliminates ice management, keeps food fresh for weeks. Dometic CFX3 35, ARB Elements, Iceco VL45, or BougeRV. A good fridge changes how you eat on the trail.
- Phase 3: Dual-battery system with solar ($600-$2,000) -- When you're running a fridge full-time on multi-day trips and need reliable power independent of engine runtime. DC-to-DC charger, LiFePO4 auxiliary battery, and 200W portable or fixed solar panel. Renogy, Battle Born, and Victron Energy are the trusted names.
The LiFePO4 Revolution
Stage 7: Storage and Organization
The most frustrating thing about being in the backcountry isn't the terrain or getting stuck. It's digging through loose gear at 9 PM in the dark trying to find a single headlamp. Good organization transforms camp setup from a 45-minute ordeal into a 10-minute routine.
- Roof rack ($400-$1,200) -- Foundation of your storage system. Carries RTT, fuel cans, recovery boards, spare tire. Prinsu, Front Runner, Yakima, and Rhino-Rack make vehicle-specific options for most popular platforms.
- Drawer systems ($700-$2,500) -- For truck beds and SUV cargo areas. Lockable, organized, accessible from the tailgate. ARB, DECKED, Goose Gear, or custom fabricated.
- Interior organization -- Molle panels on headrests and rear quarters. Cargo barriers. Stackable bins. Pro tip: Husky bins from Home Depot ($8-$15) work just as well as fancy $60 modular boxes.
- Fridge slide ($100-$300) -- Sounds like a luxury until you try pulling a 50-lb fridge out of a truck bed without one. Makes accessing your fridge dramatically more convenient.
- Fuel storage ($40-$100 per can) -- Wavian (NATO-spec) jerry cans are the standard. Mount to roof rack or rear bumper. Each 5-gallon can extends your range by 50-100 miles depending on your vehicle.
Stage 8: Lighting
Factory headlights aren't designed for picking up trail markers on a dimly lit forest road at 7 PM. And once you're at camp, you'll want more than your phone flashlight to cook dinner.
- LED headlight upgrades ($50-$150) -- Plug-and-play, dramatically more light output. Morimoto 2Stroke, Diode Dynamics SL1, or Baja Designs S2.
- Ditch lights ($100-$400) -- The most practical auxiliary lighting upgrade. Mounts near the A-pillar and fills the blind spots your headlights miss. Baja Designs Squadron, Diode Dynamics SS3, or Rigid Industries D-Series.
- Light bars ($150-$500) -- Massive distance illumination for night driving on remote roads. 20-30 inch bars on the roof or bumper cover most needs.
- Camp lighting ($55-$140) -- Rechargeable lantern plus a reliable headlamp. Goal Zero Lighthouse for camp, Petzl Actik Core for your head.
Stage 9: Communication and Navigation
This stage often gets pushed to the end of the build list, but it arguably should come earlier for anyone traveling solo or venturing into remote areas. Being able to communicate when cell service disappears isn't a luxury. It's the difference between a stressful situation and a genuine emergency.
- Satellite communicator ($200-$400) -- Garmin inReach Mini 2 is the standard. Two-way messaging, SOS capability, weather forecasts, GPS tracking your family can follow. Plans $15-$50/month. Non-negotiable for remote solo travel.
- GMRS radio ($50-$200) -- Better range and audio clarity than CB. Midland MXT275 or Rugged Radios for in-vehicle mounts. Requires an FCC license ($35 for 10 years, no exam).
- Dedicated GPS ($350-$600) -- Garmin Overlander or Montana 700i. More reliable than your phone in extreme temperatures and doesn't drain your phone battery. Preloaded topo maps work without cell service.
The Full Build Cost Breakdown
Overlanding Build Cost by Stage
| Category | Trail Ready | Well-Equipped | Full Expedition |
|---|---|---|---|
| Tires | $800-$1,200 | $1,200-$1,800 | $1,500-$2,200 |
| Suspension | $300-$600 (level kit) | $1,000-$2,000 | $2,500-$4,000 |
| Protection | $0 (stock) | $400-$800 | $1,000-$2,000 |
| Recovery | $200-$400 | $500-$800 | $1,500-$2,500 (w/ winch) |
| Shelter | $100-$300 (ground tent) | $1,200-$2,500 (softshell RTT) | $3,000-$5,000 (hardshell RTT) |
| Power | $200-$400 (power station) | $800-$1,500 (fridge + power) | $2,000-$4,000 (dual battery + solar) |
| Storage | $100-$300 (bins + rack) | $800-$1,500 | $2,000-$3,500 |
| Lighting + Comms | $50-$150 | $400-$800 | $1,000-$2,500 |
| Total Range | $2,000-$4,000 | $6,000-$12,000 | $15,000-$30,000+ |
The Key Insight
Common Overland Build Mistakes (Learn From Ours)
- Doing suspension twice -- Figure out your maximum tire size before choosing your lift. Size the kit to accommodate it. Doing it once, doing it right saves $500-$1,500.
- Buying gear before understanding needs -- Run a cooler before committing to a fridge. Use a ground tent before dropping $3,000 on an RTT. Real use reveals real needs. Fantasy builds reveal real credit card bills.
- Ignoring payload capacity -- Check the sticker inside your driver's door. An RTT, rack, fuel, drawers, fridge, gear, and passengers add up to 800+ lbs fast. Exceeding GVWR is unsafe, illegal, and voids your warranty.
- Over-modifying a compromised vehicle -- New brakes, fresh fluids, a healthy battery, and properly functioning 4WD are worth more than any trail upgrade. Fix the basics before adding the fun stuff.
- Chasing someone else's build -- Build for your trips, your terrain, your camping style. Upgrade what actually limits you. Ignore everything else. The best builds are personal.
- Financing gear instead of trips -- A $3,000 credit card bill doesn't get you anywhere. That same money buys a set of tires, basic recovery gear, and fuel for 10 weekend trips. Trips teach you what to buy next. Debt teaches you regret.
Your Build Action Plan
Month 1: Get on trails with what you have. Bring a notebook. Write down every limitation you actually encounter. Not what YouTube told you to worry about. What you actually experienced.
Month 2-3: Put quality AT tires on. Research suspension options based on your intended tire size.
Month 3-6: Suspension work, sized for your intended tire size. Add skid plates. The driving improvement is dramatic.
Month 6-9: Build your recovery kit. Practice with it in a controlled environment before you need it on a trail.
Month 9-12: Choose your shelter based on how you're actually camping after 4-6 trips. Not how you imagine camping.
Year 1-2: Add electrical and storage upgrades as trip length demands. Let your power consumption data drive the decisions.
Year 2+: Communications, lighting, and winch as trips take you to more remote, more technical terrain.
The best overland builds aren't assembled in a month with a credit card. They grow with the person doing the overlanding, shaped by real trips and real lessons. Every veteran overlander will tell you the same thing: take your time, spend money on fuel before gear, and enjoy every stage of the build. The process is half the fun.