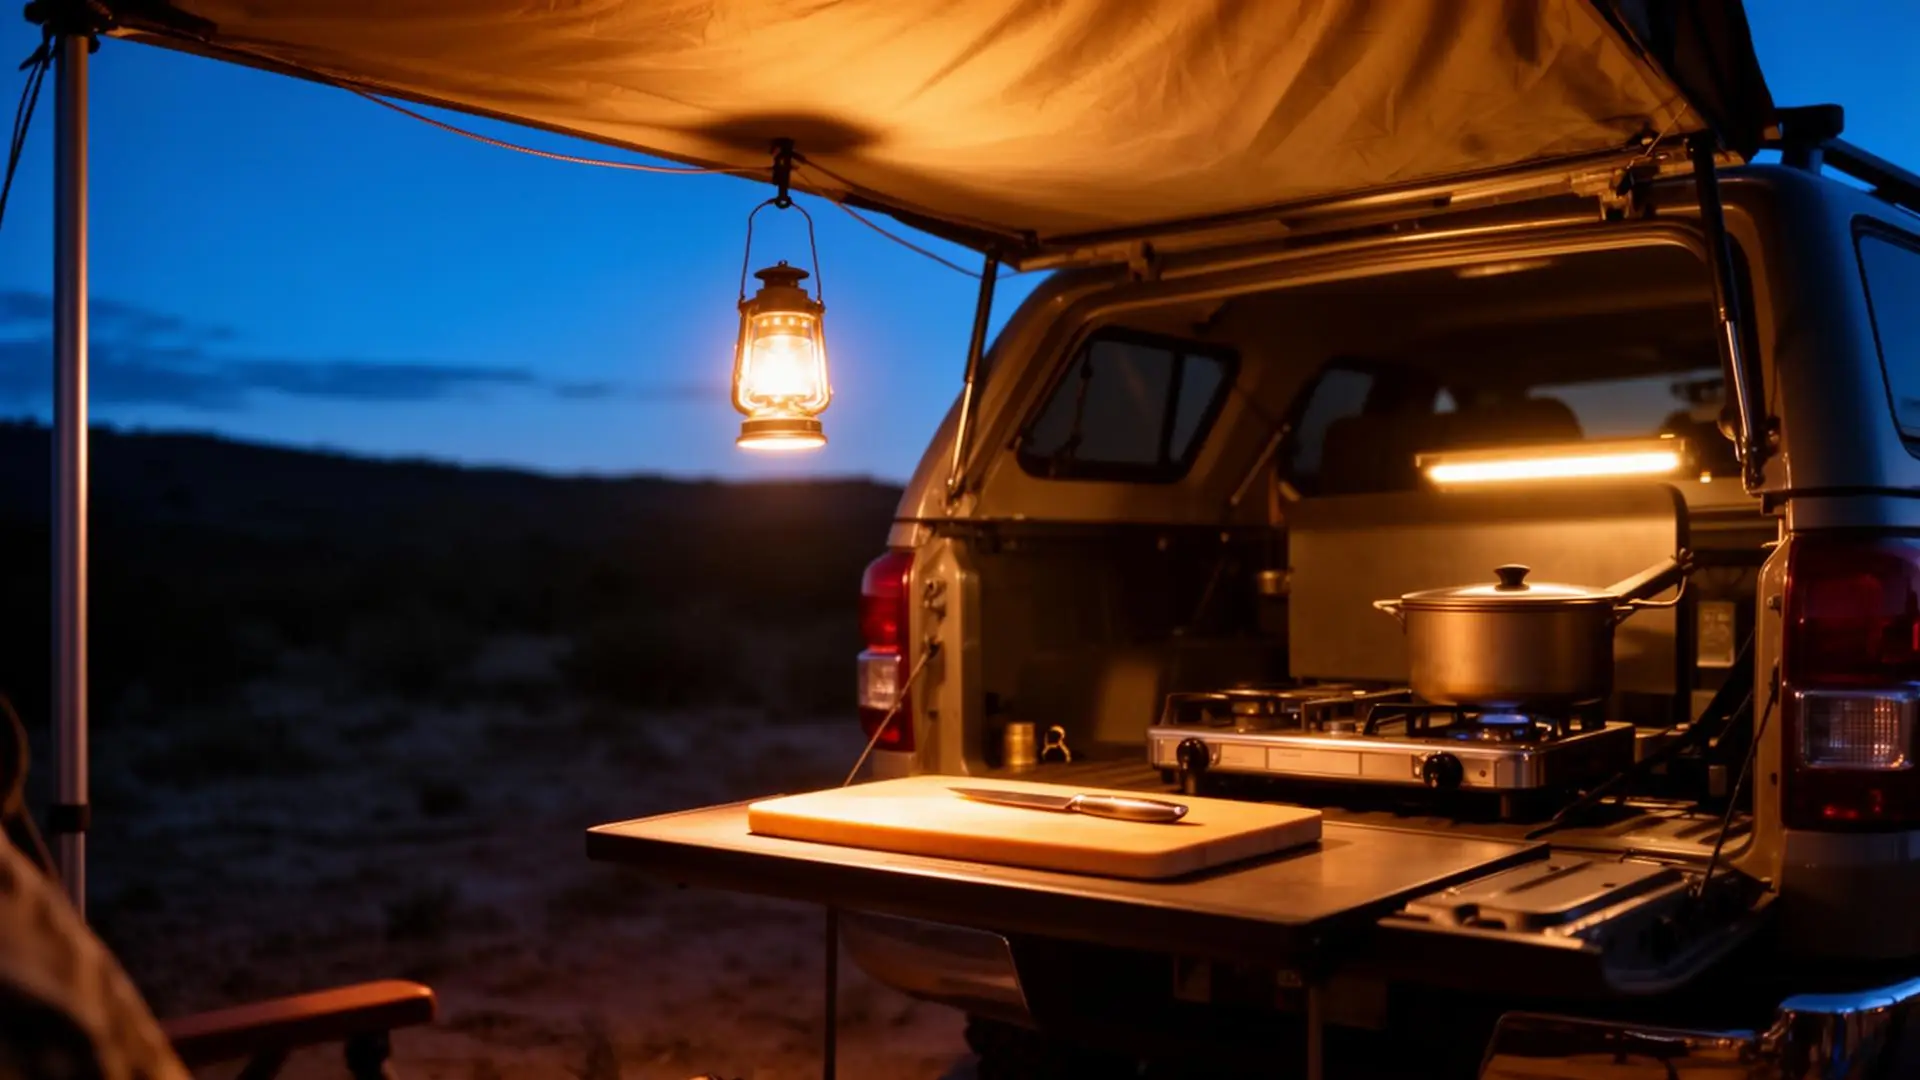
The sun always drops faster than you think it will. One minute you are backing into a flat spot, still proud of the line you picked through the ruts. The next minute the stove is half unpacked, the dog is stepping on the sleeping bags, somebody is asking where the lighter went, and your only light is a headlamp pointed directly into your friend's eyes.
That is the first law of camp lighting: if you do not set it up before you need it, you will set it up angry.
The second law is worse. Most people either bring one lantern that turns camp into an interrogation room, or they wire their rig like a shrimp boat and blast white LEDs across the entire canyon. Neither is the answer.
Quick Answer
This project is not about making your rig glow for photos. It is about cooking dinner, finding the spoon, cleaning up, checking tire pressure, and walking around camp without turning the night into a parking lot. Good camp lighting is quiet. You notice it because everything gets easier.
The Quick Build: What You Are Making
This DIY camp lighting setup gives you usable light in three zones: kitchen, shelter, and camp path.
The beginner version is simple:
- One warm LED strip or rechargeable bar light for the tailgate or camp kitchen
- One lantern or soft area light for the table or awning
- One small red or low-output marker light for walking around camp
- One battery source, either rechargeable lights, USB power bank, or small power station
- A few magnets, clips, Velcro straps, or gear ties
- A small pouch so the whole system stays together
No hardwired switch panel. No permanent holes. No roof rack light show. No camp neighbor hate crimes.
This is a setup you can build in an afternoon, test in the driveway, and move between a Tacoma, 4Runner, Bronco, Outback, Gladiator, Wrangler, van, or half-ton truck. That flexibility matters. The first version of almost any camp system should teach you where the light belongs before you drill anything into the vehicle.
The Honest Truth About Overland Camp Lighting
More light is not better. Better-placed light is better.
This is the mistake almost everyone makes. They buy the brightest lantern. Or the longest LED strip. Or a full set of rock lights because the product photo shows a truck glowing like a landing zone. Then they get to camp and discover that bright white light bounces off every shiny surface, kills night vision, attracts bugs, and makes everyone else in camp feel like they are being questioned about a bank robbery.
Camp does not need stadium lighting. Camp needs useful light in the right places. That usually means:
- Warm light instead of harsh blue-white light
- Lower brightness than you think
- Light pointed down, not out
- Multiple small lights instead of one giant lantern
- A headlamp for tasks, not for conversations
- Red or very dim light for late-night movement
The goal is not to defeat darkness. The goal is to work with it. A good camp lighting system lets you cook, eat, clean, read a map, find your sandals, and walk to the bushes without ruining the reason you came outside in the first place.
Parts List: The $75 Version Most People Should Build
The sweet spot is a portable, warm-light setup that clips or magnets into place and packs into one small pouch.
| Part | Typical cost | What to look for |
|---|---|---|
| Warm LED strip or rechargeable bar light | $15 to $35 | 2700K to 3500K color, dimmable if possible |
| Small lantern or area light | $20 to $40 | Warm mode, low mode, stable base or hanging hook |
| Red marker light or low-output clip light | $8 to $20 | Red mode or very low white output |
| USB power bank or small power station | $20 to $150 | Only needed if lights are not self-powered |
| Magnets, clips, Velcro, or gear ties | $5 to $15 | Lets you aim light without drilling |
| Small pouch or tote | $5 to $15 | Keeps lights, cables, clips, and charging cords together |
| Optional dimmer switch | $5 to $15 | Useful for LED strips that are too bright |
| Optional diffuser | $0 to $10 | Softens harsh light with tape, silicone sleeve, or fabric shade |
Most people can build the useful version for $50 to $100, especially if they already own a power bank or rechargeable lantern. The expensive version is not automatically better. A $30 light in the right place beats a $300 light pointed at the wrong thing.
The Three Versions: Cheap, Better, and Wired
There are three realistic camp lighting paths: rechargeable lights, portable 12V lights, or hardwired vehicle lights. Start portable unless you already know exactly where the light belongs.
| Version | Typical cost | Best for | What you get | Main trade-off |
|---|---|---|---|---|
| Rechargeable lights | $40 to $90 | Most weekend overlanders | No wiring, no vehicle mods, easy to move | Must remember to charge them |
| USB or power station lights | $60 to $150 | Camp kitchens and longer trips | Longer runtime, flexible placement | More cables and battery management |
| 12V hardwired lights | $150+ | Dedicated builds and frequent campers | Clean install, switch control, always ready | More work, more planning, harder to change |
| Rock lights as camp lights | $100+ | Dual-use trail and camp lighting | Undercarriage utility and ground visibility | Often too bright, white, or aimed wrong for camp |
If you are building your first camp lighting system, start with rechargeable or USB-powered lights. Hardwiring should come later, after a few nights of learning where you actually cook, sit, clean, and dig through bags. The driveway is not camp. The trailhead is not camp. Camp is where the truth shows up.
Why Warm Light Matters
Warm light is easier on your eyes, kinder to camp, and better for keeping the night feeling like night.
Light color is measured in Kelvin. You do not need to become a lighting engineer. You just need to know the rough zones.
| Color temperature | What it feels like | Camp verdict |
|---|---|---|
| 2700K | Warm household bulb, campfire-adjacent | Best for living areas |
| 3000K to 3500K | Warm white, useful but not harsh | Great for kitchens |
| 4000K | Neutral white | Usable for work lights |
| 5000K to 6500K | Cool white, blue-white, daylight look | Usually too harsh for camp |
A lot of cheap LEDs are 6000K because they look bright in product photos. They also make camp feel like a gas station bathroom. Warm light may look less impressive online, but it works better in real life. Food looks normal. Faces look human. Bugs are less excited. Your eyes recover faster when you look away.
That matters when you are trying to see stars, read terrain, or not trip over the guyline you forgot you tied at shin height.
Where Camp Actually Needs Light
Do not light the whole vehicle. Light the tasks.
Most camps need three lighting zones.
1. The kitchen zone
This is the most important light. Your kitchen light should illuminate stove controls, cutting board, utensils, food prep, water jug, trash bag, and dish basin.
The best placement is usually above and slightly in front of the work surface, pointed down. A light behind you will cast your own shadow across the cutting board, which is exactly how onions end up in the dirt.
For trucks, that might mean the inside edge of a bed rack, tailgate canopy, or awning arm. For SUVs, it might be the open hatch, rear cargo light area, or a magnetic strip on the hatch frame. For vans, it might be a rear door or galley shelf. The key is downlight. Not outlight. Downlight.
2. The living zone
This is the softer light for eating, sitting, changing layers, finding the deck of cards, and pretending you are not checking tomorrow's route again. A small lantern on low mode is usually enough. Hang it from an awning, branch, hatch, or roof rack, but keep it low and warm. High lanterns spread light everywhere. Lower lights create a usable pool without broadcasting your camp to the entire valley.
3. The movement zone
This is the light that helps you walk around without grabbing your full headlamp every time. A red marker light, dim clip light, or low lantern near the vehicle step can be enough. You are not trying to inspect a differential. You are trying not to step on a dog, rock, cooler, or tent stake. Late-night light should be boring and dim. That is how you know it is working.
Step-by-Step: Build the No-Drill Camp Lighting Setup
The whole project should take about an hour, plus one night in the driveway to test placement.
1. Choose the kitchen light first
Start with the place you cook. If you use a tailgate, buy or repurpose a light that can mount above the tailgate. If you cook from a camp table, choose something that clips to the table, awning pole, hatch, or roof rack. If you use a pull-out drawer kitchen, mount the light to the hatch, rack, or drawer face where it points down.
Good kitchen lights are warm white, dimmable, easy to aim, easy to remove, bright enough for chopping food, and not so bright they blind the cook. A rechargeable LED bar, USB LED strip, or small magnetic work light can all work. Do not buy the light because it is bright. Buy it because it can aim downward at the thing you actually use.
2. Add a soft area light
This is the light for the rest of camp. A small lantern with a warm mode is the easy answer. Put it on a table, hang it from an awning, or place it near the seating area. If it has a dimmer, use it. If everyone can still see their plate and find their drink, it is bright enough. The goal is not to make camp look like noon. The goal is to make camp feel calm after dark.
3. Add a low movement light
This is the tiny light that saves ankles. Put a dim red clip light near the vehicle step, cooler, or tent entrance. It should be visible enough to orient you without waking everyone up or wrecking night vision. A red bike light, tent light, or low-output headlamp clipped to a handle can work. This is not the glamorous part of the setup, but it is the one you will appreciate at 2:13 a.m.
4. Decide how the lights attach
Mounting is where DIY camp lighting either becomes useful or annoying. Good no-drill mounting options:
- Magnets on steel body panels or rack parts
- Velcro straps around awning arms or rack tubes
- Gear ties around hatch struts or table legs
- Spring clamps on camp tables
- Carabiners from hatch latches, rack slots, or tent loops
- Adhesive Velcro on non-critical surfaces
Avoid permanent adhesive until you have tested the location for a few trips. The first place you mount a light is rarely the final place.
5. Build the lighting pouch
Put every light, cable, clip, strap, magnet, and charging cord in one pouch. That pouch is now your lighting kit. When you get to camp, the kit comes out early, before the stove and before the chairs. When you pack up, the kit goes back together so you are not hunting for a USB cable under the driver's seat three weeks later. This is the unsexy part that makes the whole system work.
6. Test it in the driveway, then test it at camp
Set up your kitchen in the driveway after dark. Actually make tea, cut an onion, wash a cup, open the cooler, and pack the stove away. You will learn more in ten minutes than you will from two hours of product reviews. Then use it on a real trip and change what annoys you. That is the whole DIY process: build, use, adjust, stop when it works.
Power: Rechargeable, USB, or 12V?
The right power source depends on how often you camp and how much you already rely on batteries.
Rechargeable lights
Rechargeable lights are the easiest starting point. They need no wiring, no vehicle battery risk, are easy to move, cheap, and work in any vehicle. The downside is you must charge them, batteries degrade over time, and cheap ones may have weird modes or bad switches. For weekend trips, this is usually enough.
USB lights and power banks
USB-powered LED strips or bar lights are a nice middle ground. They can run from a power bank, small power station, or vehicle USB outlet. You get long runtime with a decent power bank, easy parts replacement, and good compatibility with solar or camp power setups. The downsides are messy cables, some lights are too bright without a dimmer, and you have one more battery to manage. If you already bring a power station for a fridge or camera gear, USB lighting makes sense.
12V hardwired lights
Hardwired lights make sense when your camp layout is consistent and the vehicle is a dedicated build. They are clean, switch-controlled, always mounted, and good for frequent use. The trade-off is cost, wiring and fusing work, harder to change, and the risk of draining the vehicle battery if wired poorly. If you hardwire, fuse the circuit properly and know what battery it is drawing from. Camp lighting should not be the reason your truck will not start in the morning.
Safety: Do Not Let a Cheap Light Become the Problem
Camp lighting is simple, but batteries, wiring, heat, and bad placement still matter.
Keep the basics boring. Do not run unfused 12V wiring. Do not pinch wires in hatches or doors. Do not mount lights where they melt, rub, or collect water. Do not leave lithium battery lights baking on the dash in summer. Do not aim bright lights toward roads, other campsites, or drivers. Do not use indoor-only lights in rain. Do not rely on camp lights as recovery lights.
Also, keep one headlamp per person. Camp lighting makes camp easier. It does not replace personal light when someone walks away from the vehicle, digs through a bag, checks a tent stake, or handles a problem in the dark. The headlamp rule is simple: if you have a head, you get a headlamp. Just stop wearing it at full blast during conversations.
The Mistakes That Make Camp Lighting Terrible
Bad camp lighting usually fails because it is too bright, too white, too high, or too hard to set up.
Mistake 1: One giant lantern
One giant lantern creates shadows, glare, and arguments. It lights everything badly instead of lighting the important things well. Use multiple smaller lights instead.
Mistake 2: Cool-white LEDs everywhere
Cool-white LEDs look bright, but camp is not a warehouse. Warm light is easier to live with and less obnoxious to everyone nearby.
Mistake 3: Mounting lights too high
High lights spread everywhere and shine into eyes. Lower lights create useful pools of light. Put light near the work, not on top of the world.
Mistake 4: Forgetting the kitchen shadow
If the light is behind you, your body becomes the eclipse. Put the kitchen light above or in front of the work surface so your hands do not block the thing you are trying to see.
Mistake 5: Hardwiring too early
The first permanent install is often wrong. Use magnets, clips, and straps first. Once you have used the same light in the same place for several trips, then think about a permanent mount.
Mistake 6: Making camp visible from space
Nobody came outside to sit under a security light. Turn it down. Aim it down. Let the night exist.
Vehicle-Specific Setup Ideas
The same lighting kit works across different vehicles if you think in zones instead of platforms.
Tacoma, Gladiator, Ranger, Colorado, and other trucks
Use the tailgate as your main kitchen surface. Mount a warm LED bar under the bed rack, canopy, tonneau edge, or awning arm so it points down at the tailgate. If you have a bed rack, Velcro straps or magnets can make the setup clean without drilling. Keep one lantern for the table and one dim red light near the step or rear tire. Trucks make lighting easy because the kitchen usually happens at the back.
4Runner, Bronco, Wrangler, and SUVs
The open hatch is your friend. A magnetic or clipped light on the hatch frame can illuminate the cargo area and rear table. If you cook from a fold-down tailgate table or camp table near the rear bumper, aim the light down and slightly outward. Be careful with interior cargo lights. They are often too weak, badly aimed, or tied to door-open behavior that annoys everyone. A separate removable light is usually better.
Subaru Outback, Forester, Crosstrek, RAV4, and soft-roaders
Soft-roaders need compact lighting because cargo space is tight. Use a rechargeable bar light on the hatch, a small lantern on the table, and a red clip light near the rear bumper or tent entrance. Keep the whole kit in a pouch under the sleeping platform or in the kitchen tote. The goal is not to build a show rig. The goal is to make a small camp feel organized after dark.
Vans and campers
Vans can support permanent lighting, but start with the same zone logic. Kitchen light. Living light. Movement light. If you hardwire later, keep circuits dimmable and warm. Van interiors can feel sterile fast when every light is bright white.
What to Skip
Skip anything that adds complexity before it adds usefulness.
You probably do not need eight rock lights just to cook dinner, a roof rack light bar for camp chores, app-controlled RGB lighting, permanent wiring on your first attempt, giant lanterns with only one brightness mode, cheap LED strips that cannot handle dust or moisture, or anything that requires the vehicle battery unless you understand the draw.
Some of that gear has a place. Rock lights can be useful for spotting tire placement, checking under the vehicle, and moving around camp. Light bars are useful on trails when used legally and responsibly. RGB lights are fun if that is your thing. But for a first DIY camp lighting setup, they are not the core problem. The core problem is dinner after dark. Solve that first.
Who Should Build This
This project is for anyone whose camp gets harder than it needs to after sunset.
Build it if you cook at camp, set up after work on Friday, hate wearing a headlamp for every small task, travel with kids, dogs, or friends who constantly ask where things are, use a tailgate, hatch, or camp table as your kitchen, want better light without drilling holes, or want a cheap project that improves every trip immediately.
Skip it if you only camp in developed sites with table lights and hookups, you already have a well-sorted van or trailer electrical system, you never cook after dark, or you are not willing to charge or pack small lights.
This is not a flex mod. It is a friction mod. Good ones are usually the ones you stop noticing because they just make camp work.
The Bottom Line
The best DIY overland camp lighting setup is warm, low, portable, and pointed at the jobs you actually do after dark.
You do not need a glowing truck. You need to see the stove knob. You need to find the knife without emptying the drawer. You need to rinse a cup, pour coffee water, keep the dog out of the onion pile, and walk back from the tent without punting a rock into your own ankle.
That is camp lighting. Not brightness. Usefulness.
Build the simple version first: kitchen light, soft area light, small movement light, and one pouch that keeps the whole thing together. Use it for a few trips. Move the lights around. Find the shadows. Turn everything down. Most people learn this after buying too much light. You can learn it for about seventy-five bucks.