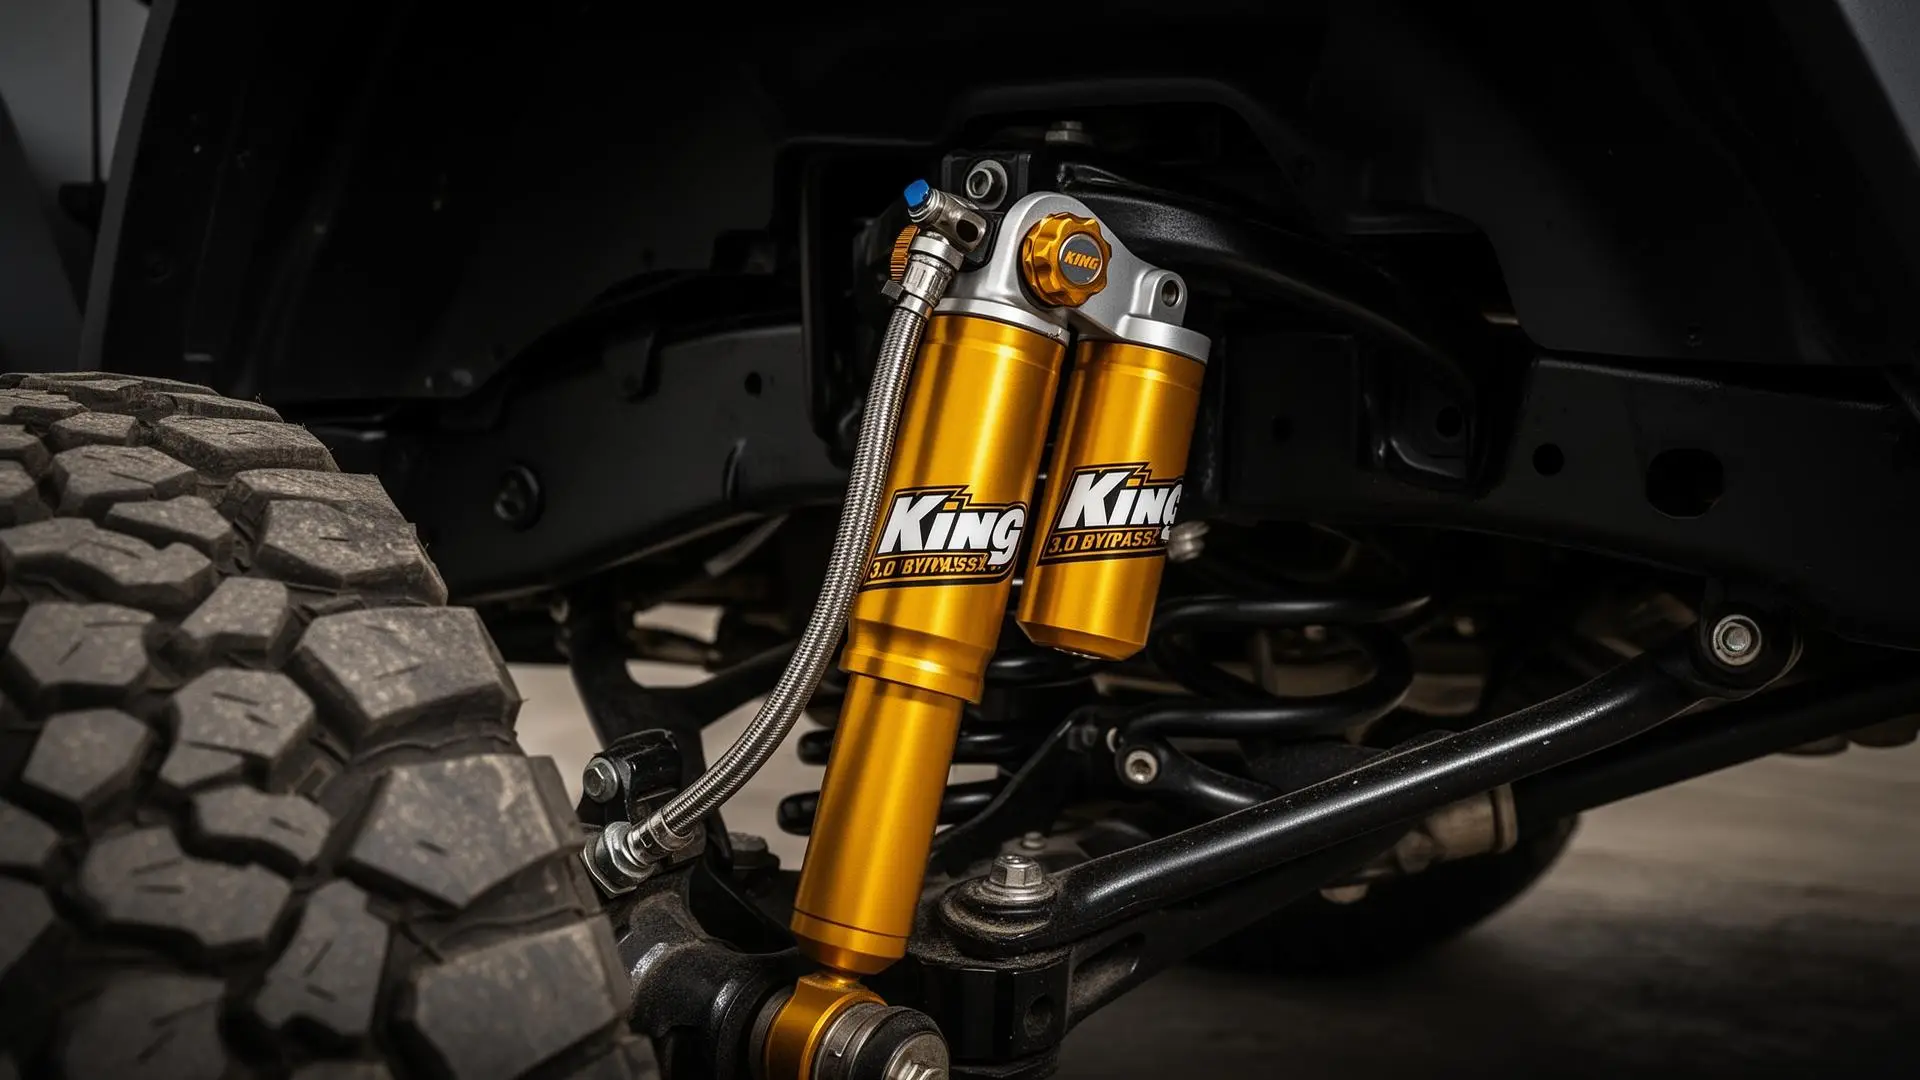
Even factory suspension keeps getting better, but most modern off-road rigs still don't give you easy, external compression tuning. For a Gladiator that sees real trail time and real weight, King 3.0 internal bypass shocks are one of the best "endgame" upgrades you can make.
Why Compression Adjustability Matters
Compression damping controls how fast your shock compresses when the tire hits something. It's the foundation of how your Gladiator feels on every surface, and getting it wrong can ruin an otherwise great setup.
Too Little Compression
- Gladiator feels loose and wallowy
- Blows through travel easily
- Bottoms out on moderate hits
- Poor body control in corners and transitions
Too Much Compression
- Ride gets stiff and harsh
- Skips and hops on small chatter
- Fatiguing on long trail days
- Reduced traction as tires bounce instead of conform
Why This Matters for Gladiators
The King 3.0 Upgrade Concept
For a Gladiator that sees real trail time and carries real weight, a common "endgame" setup is King 3.0 Internal Bypass Shocks with external compression adjusters (if equipped).
King's 3.0 platform is popular for good reason:
- Big oil volume for consistent damping
- Strong heat management on long trail days
- Damping feel that stays consistent when you're pushing hard
- Internal bypass behavior that adapts through the stroke
Important Note
What Compression "Tuning" Actually Changes
Compression is basically your shock's "resistance" on impact. Here's how it shows up in real-world driving:
Low-Speed Events (Slow Suspension Movement)
| Event Type | What Happens |
|---|---|
| Braking dive | Front end dips under braking |
| Body roll | Lean in corners |
| Cornering | Weight transfer side-to-side |
| Towing/hauling | Rear squat under load |
| Transitions | Weight shifts between maneuvers |
More compression here = tighter, more controlled body feel.
High-Speed Events (Fast Hits)
| Event Type | What Happens |
|---|---|
| Potholes | Sharp, sudden impacts |
| Sharp rocks | Irregular trail obstacles |
| Washboard | Rapid repeated hits |
| G-outs | Compression at bottom of dips |
| Whoops | Series of bumps at speed |
| Bottom-out events | Full travel compression |
More compression here = better impact control, less smashing into bumpstops (but too much can feel harsh).
With King internal bypass, a lot of the "magic" comes from where you are in the stroke, bypass zones feel plush early and ramp up firmness deeper in travel.
Why Choose King 3.0 Internal Bypass?
Here's what you're really paying for:
| Feature | Benefit |
|---|---|
| Internal bypass behavior | Smoother on small chatter, while ramping up control deeper in travel |
| 3.0-inch body | More oil volume = less fade, better consistency on long trail days |
| Heat management | Bigger bodies and reservoirs keep shocks predictable instead of mushy |
| Tunability | Well-supported by shops for valving changes, spring matching, dialing |
Real-World Setup Mindset: Front + Rear
Instead of obsessing over part numbers, focus on what matters most for your specific build.
Rear: The Gladiator Weight Trap
Gladiators get heavy in the back fast. Common additions that add serious weight:
- Bed racks and rooftop tents
- Spare tire carriers
- Drawer systems and tool kits
- Fridge and recovery gear
- Tray beds or full overland builds
Rear Success Formula
- • Match springs to your constant load (not your "dream" weight)
- • Tune compression to prevent wallow and bottoming
- • Confirm bumpstops so the shock never becomes the bumpstop
Front: Protect Up-Travel
In the front, it's easy to build a "tall" Jeep that looks cool but has not enough up-travel, making it feel harsh on every bump.
Front Success Formula
- • Prioritize usable up-travel
- • Tune compression to reduce dive and harsh hits
- • Mount reservoirs safely away from heat and sharp edges
- • Cycle suspension to verify clearance at full articulation
Bumpstop and Travel Validation (Do This or Regret It)
If you upgrade to longer-travel shocks or change ride height, this step is non-negotiable:
- Remove springs (or disconnect as needed per your shop's safe method)
- Cycle suspension to full bump
- Confirm bumpstop contacts before the shock bottoms out
- Repeat at steering lock + articulation (front especially)
Critical
Compression Tuning: A Simple, Repeatable Method
Here's a practical approach that works whether your Kings have a single compression adjuster or you're relying on bypass/valving behavior.
Step 1: Start Soft(ish)
- Start near the softer end of the adjuster range
- Drive a known loop: streets → freeway → a rough road or trail section
- Note how the Gladiator feels at each stage
Step 2: Fix the Biggest Problem First
Pick ONE issue to address:
| Problem | Solution |
|---|---|
| Bottoming too easily / slamming bumpstops | Add compression a few clicks |
| Too much brake dive / body roll | Add compression a few clicks |
| Harsh on small chatter | Soften compression a few clicks |
Step 3: Adjust in Small Moves
- 1 to 2 clicks at a time
- Re-test the same section
- Take notes (load, tire pressure, terrain)
- Don't chase perfection, find "good enough" first
Step 4: Save "Load Profiles"
You'll end up with 2 to 3 go-to settings you can dial in quickly:
| Profile | Compression Setting | Use Case |
|---|---|---|
| Daily driving | Softer (1/4 to 1/3) | Unloaded, street comfort |
| Loaded overland | Medium (1/2 to 2/3) | Family trip, gear loaded |
| Aggressive trail | Firmer (2/3 to 3/4) | Fast trail, technical sections |
Don't Ignore Tires (They're Part of the Suspension)
If you're on 37s, 40s, your tires are doing huge work for ride quality. They're essentially part of your suspension system.
- Lower PSI = more compliance, better grip, smoother ride
- Too low PSI = sloppy steering, heat buildup, sidewall risk
- Beadlocks help when you run low pressure on tough trails
If Your Shocks Feel Harsh No Matter What
- • Tire PSI too high
- • Not enough up-travel
- • Spring rate too stiff for your load
- • Compression set too firm
- • Bumpstop contact happening too early in travel
King 3.0 vs Other Options
Here's how King 3.0 stacks up against other popular Gladiator shock upgrades:
| Shock | Price Range | Best For |
|---|---|---|
| Fox 2.5 Factory | $1,200-1,800 | Great mid-tier, adjustable rebound |
| King 2.5 Coilovers | $1,500-2,500 | Good balance, remote reservoirs |
| King 3.0 IBP | $3,000-5,000 | Endgame, heavy builds, consistent performance |
| Icon Stage 4+ | $2,500-4,000 | Complete system, good support |
| Carli Suspension | $3,500-6,000 | Premium, purpose-built systems |
Installation Considerations
King 3.0 shocks aren't plug-and-play for everyone. Consider:
- Professional installation recommended for proper valving and setup
- Reservoir mounting requires planning for clearance and heat
- Spring matching is critical, don't use stock springs with King 3.0s
- Alignment after installation is mandatory
- Budget $500-1,000 for professional install and initial setup
Frequently Asked Questions
What's the main benefit of upgrading to King 3.0 internal bypass shocks on a Gladiator?
Consistency and control. You get a more composed ride across mixed terrain, better performance when shocks heat up, and a damping curve that feels smoother early in travel while ramping up deeper in the stroke.
Do I need tools to adjust the compression?
If your Kings are equipped with external compression adjusters, you can typically adjust by hand at the reservoir. If not, tuning changes come from valving, bypass behavior, springs, and setup, which requires shop work.
How do I keep the ride from getting harsh?
Prioritize up-travel, don't over-spring the Jeep, keep tire pressure realistic, and avoid cranking compression just to "feel firm." Harshness is usually a setup issue, not a "needs more clicks" issue.
What's the safest way to set bumpstops after a shock upgrade?
Cycle the suspension to full bump (springs out) and confirm bumpstop engagement occurs before the shock bottoms out, then verify at articulation and steering lock.
What springs should I run if I added a lot of rear weight?
A spring matched to your constant, real-world load, not your empty curb weight. Heavy-duty rear coils are often needed once you add racks, spares, drawer systems, or overland gear.
The Bottom Line
King 3.0 internal bypass shocks are an investment, but for Gladiator owners who demand consistent performance across varied terrain and changing loads, they're the gold standard. The key to getting your money's worth is proper setup: matched springs, validated bumpstops, and taking the time to dial in compression for your specific build.
Start soft, fix one problem at a time, and save your settings for different load conditions. With patience and methodical tuning, you'll have a Gladiator that handles everything from the daily commute to loaded overland trips with confidence.